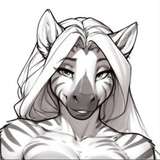
Its finally here!
So, lets get started!
🥩 STEP 1 - SKETCH
I'm gonna be honest here, I made a base sketch super fast with my tablet, and then 1 or 2 days later I made the second sketch with mouse. I was super blocked looking at the base sketch and suddenly I started working on the second sketch with my mouse because my tablet was not connected. The blue lines are details that I didn't want to miss in the final linework.

🥩 STEP 2 - LINEWORK
Here you can see that It seems like I added the earrings early, but I didn't, that's because I completely forgot to add them when I was working with the linework, and I noticed it when I was coloring. lol.

🥩 STEP 3 - COLORING
Here you can see that I first added a ring on her finger, but I didn't like the final idea. So I removed it in the final step.

🥩 STEP 4 - FIRST SHADING
Here is when the base shading is added.

🥩 STEP 5 - SECOND SHADING AND EYE DETAILS
I added a second slight shading that gives more volume to the drawing.

EYE DETAILS:
Added eye details so it looks more "interesting", and personally I think it gives more life to the character.

🥩 STEP 6 - LIGHTING AND MORE DETAILS
Here I added a white lighting in the middle of the character with Overlay. I also added a few lighting details on the face, body and hair to give even more volume and life to the drawing.

🥩 STEP 7 - SECOND SHADING AND MORE DETAILS
As soon as you add the second lighting with a warm color the drawing can change drastically, as you can see. Here I added a yellowish/orange color above the drawing.
I added more details to her goggles to make it more real but yet like anime-looking lighting.
I also added her scars and more details to her gold jewelry, and contrast on her hands and arms.

🥩 STEP 8 - BACKGROUND
Here I decided the background I wanted to continue the drawing.

🥩 STEP 9 - LIGHTING DETAILS
Here I added red lighting on her jewelry, goggles and a little bit on her face and arms (only a tiny bit on her face).
I also added a red lighting detail on her eyelashes.

🥩 STEP 10 - FINAL TOUCHES AND MOUTH DETAILS
Here I added a little bit of "fire" details on her hair and I also added contrast on her hands and body.
I added lighting on her claws and details to the background.

MOUTH DETAILS:
So, here I added more details to the mouth because I wanted to make sure that is clear that she is raising her lip with her finger and I didn't want it to look like she is "pointing out" the mouth.


After a few little details on photoshop its DONE!
I really hope it helps and thank you very much!